
What is the problem?
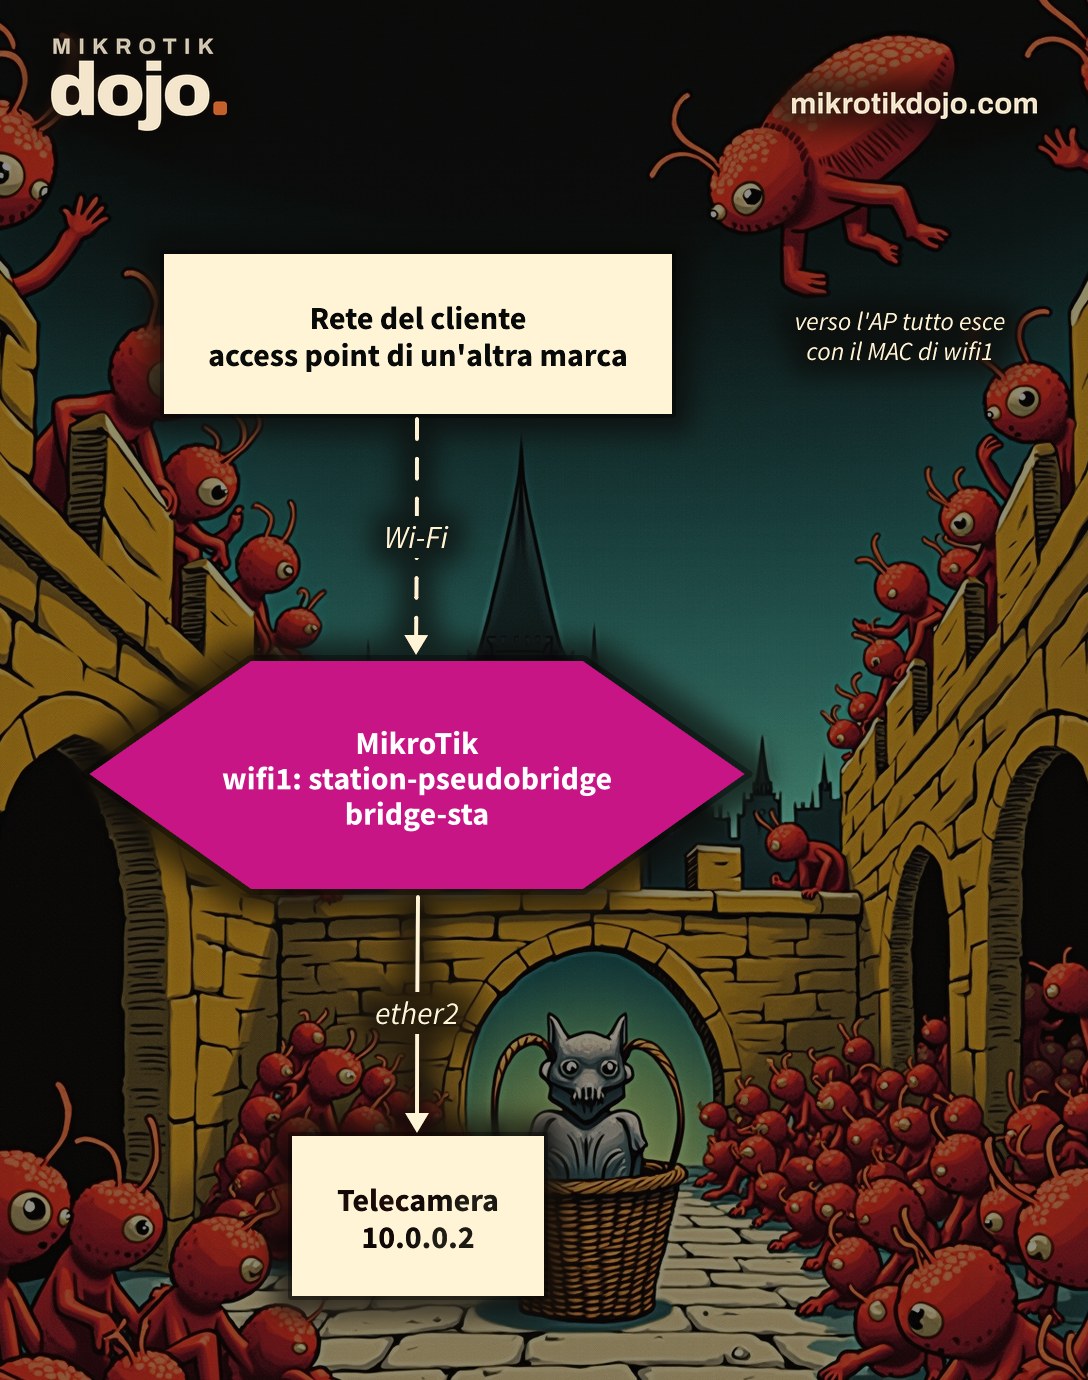
A classic scenario: a warehouse, a camera, or a PC where the cable doesn’t reach, but the client’s Wi-Fi signal is strong. You take a MikroTik with Wi-Fi, connect it as a client (station) to the access point, put the Wi-Fi and the camera’s port in the same bridge, and expect the camera to appear on the network as if it were connected via cable.
It doesn’t appear. The MikroTik is connected, the signal is excellent, but nothing passes through behind it. I reproduced this in the lab: with the station in normal mode, the camera behind the MikroTik is unreachable, zero ping on zero.
The reason lies in how Wi-Fi works. An access point accepts and delivers frames only for the MAC addresses that have connected to it. The MikroTik connected with its own MAC; the camera, with its own, does not exist for the access point. Frames concerning it are simply discarded.
Step 1: which mode do I choose?
It depends on what is on the other side:
- MikroTik access point: use
station-bridge, the true bridge, transparent for all protocols. It works only between MikroTik devices, and between radios of the same driver type; - access point from another brand (for example, the operator’s router): use
station-pseudobridge. The MikroTik presents itself to the access point always with its own MAC, and behind the scenes translates the addresses for devices connected via cable. A kind of NAT, but for MACs.
This howto is for the second case, the most frequent in the field. The differences between the modes are in the MikroTik manual: WiFi.
Step 2: how do I connect the MikroTik to the access point?
On the wifi package of RouterOS 7 (Wi-Fi 6 models and newer):
/interface wifi set wifi1 configuration.mode=station-pseudobridge \
    configuration.ssid="Rete-Cliente" configuration.country=Italy \
    security.authentication-types=wpa2-psk security.passphrase="la-password-del-wifi" \
    disabled=no
Check that it is connected:
/interface wifi registration-table printA line with the access point, the signal, and how long it has been connected must appear. If the signal is worse than -75 or so, move the device before proceeding: a weak connection can make even a well-configured setup appear broken.
Step 3: how do I create the bridge?
/interface bridge add name=bridge-sta protocol-mode=none
/interface bridge port
add bridge=bridge-sta interface=wifi1
add bridge=bridge-sta interface=ether2
ether2 is the camera’s port, or the switch with the devices to connect. protocol-mode=none disables spanning tree on this bridge: with a single Wi-Fi port towards an access point, there is no loop to avoid, and MikroTik warns that in this mode spanning tree can interfere with DHCP. I tested it this way in the lab.
If the device behind uses DHCP, it gets the address from the client’s router, as if it had a cable.
Step 4: how do I verify that it works?
From the MikroTik, check who sees the bridge:
/interface bridge host print where bridge=bridge-staOn port ether2, the camera’s MAC must appear; on wifi1, those of the client’s network. Then, from a PC on the client’s network, try to reach the device:
ping 10.0.0.2
arp -a
In the lab, the station was a routerboard with Wi-Fi 802.11ax connected to an access point from a different brand, with a camera behind it using a fixed IP address. The ping responds, the camera’s web page opens, and the RTSP stream on port 554 is reachable. And arp -a on the PC shows something curious: the camera’s IP address associated with the MikroTik’s MAC, not the camera’s. This is “NAT on MACs” in action.
Step 5: and why don’t I do it manually with bridge NAT?
In the days of RouterOS 5 and 6, when this mode was missing or malfunctioning, it was done manually with bridge NAT: one rule to rewrite the MAC of traffic leaving the Wi-Fi, one to answer ARP on behalf of the camera, and one to redirect incoming frames to the correct MAC. Out of curiosity, I redid it on the same routerboard:
/interface bridge nat
add chain=srcnat out-interface=wifi1 action=src-nat to-src-mac-address=<MAC di wifi1>
add chain=dstnat in-interface=wifi1 mac-protocol=arp arp-dst-address=10.0.0.2/32 \
    action=arp-reply to-arp-reply-mac-address=<MAC di wifi1>
add chain=dstnat in-interface=wifi1 mac-protocol=ip dst-address=10.0.0.2/32 \
    action=dst-nat to-dst-mac-address=<MAC della telecamera>
It works for a few seconds. Then it breaks, and the reason is instructive. Bridge NAT rewrites the frame header, but not the content of the ARP packets. When the camera asks “who is the gateway?”, its real MAC is written inside the question. The client PC reads it, notes it down, and from that moment on sends packets to the camera’s MAC, which the access point does not know and discards. In the lab, after a few seconds, the PC had the camera’s real MAC in its table and pings had dropped to one in five.
station-pseudobridge also translates ARP. Returning to automatic mode, everything started working again on its own in less than a minute. Bridge NAT remains a powerful tool for other jobs: for example, to intercept DNS with an invisible MikroTik, as in the howto on transparent DNS with bridge NAT. Its actions are in the MikroTik manual: Bridging and Switching.
What do I check before putting it into production?
- behind, everyone has the same MAC: for the client’s router, every device behind the MikroTik has the MikroTik’s MAC. DHCP reservations by MAC, MAC filters, and per-device statistics on the router no longer distinguish them. With only one device behind, no problem; with many, it is better to use a true routed link or a MikroTik access point with
station-bridge; - only IPv4 is translated for each device: for other protocols, the MikroTik uses the first MAC it has seen pass through. With a single device behind, everything works; with more than one, IPv6 and non-IP protocols may end up at the wrong device;
- the MikroTik acting as a bridge must be protected like any other router: follow the Basic Hardening of a MikroTik Router.
Tested in the lab on a routerboard with Wi-Fi 802.11ax running RouterOS 7.24.5 (stable), package wifi, connected as a station to a Wi-Fi 6 access point from a different brand, at 5 GHz, with a PoE camera with a fixed IP address on a bridge port: mode station (camera unreachable), station-pseudobridge (ping, web page, and RTSP port reachable from the access point’s network), manual bridge NAT (works for a few seconds, then breaks due to ARP).
Frequently asked questions
Why does a MikroTik in station mode not pass bridge traffic?
Because the access point only accepts frames for the MAC addresses that have associated with it. The devices behind the station have different MAC addresses, and their frames are dropped. You need station-bridge towards a MikroTik access point, or station-pseudobridge towards one from other brands.
What is the difference between station-bridge and station-pseudobridge?
station-bridge is a true transparent bridge, but it only works with MikroTik access points. station-pseudobridge works with any access point: it translates the MAC addresses of the devices behind the station to its own, per IPv4 device.
Can I use bridge NAT instead of station-pseudobridge?
You could, but it is fragile: bridge NAT changes the frame header and not the content of ARP packets, so other devices end up learning the real MAC address of the device behind the station and the link breaks. station-pseudobridge also translates ARP.
Does the main router see the devices behind the station?
It sees them with their IP address, but all with the MikroTik’s MAC address. DHCP reservations and MAC-based filters cannot distinguish them.